NOTE: Okan Arts has sold out of Vintage Kasuri Packs. It is getting quite difficult to obtain the fabric at a reasonable price. As soon as we can collect more, we will offer the Packs again.
By Patricia Belyea
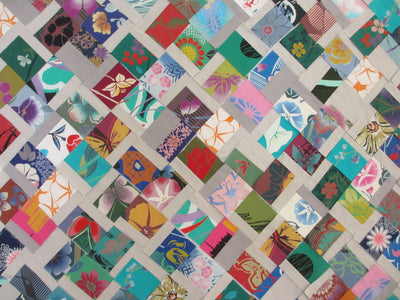
WAUCONDA WA. For my Kasuri Placemats, I used two packs of Vintage Kasuri—each with five 1/2 yard pieces of ikat-woven cotton from Japan.
The two packs yielded enough kasuri cotton for six placemats but I only had enough backing fabric for four placements. So, I’m saving the extra kasuri for patching jeans.

To start, I pre-washed all of my kasuri cotton with color catchers. It took three washes in my front-loading machine (Warm/Cold cycle) with three color catchers per load to release the botanical indigo.
Reading the packaging, I got the tip to place my color catchers in a net bag so they wouldn’t clog my drain.

When the pre-washing was complete, I noted three things: 1/ the cotton had shrunk (which was expected), 2/ the fabric had frayed (I trimmed off the threads), and 3/ the pre-washed fabric was brighter than the original (which was unexpected).
I sliced the kasuri cotton into 3 1/2" strips across the 14" width.
I sewed six strips together for each placemat, pressing the seam allowances to one side.


To square up the placemat fronts, I made a 12" x 18" trim template out of freezer paper. I pressed the trim template to the right side of each placemat front and trimmed around the template, adding a 1/4" on all sides with my gridded ruler and rotary cutter.

I used the same trim template to cut out my backing fabric — shirt-weight denim. (One of my backs was made with scraps of the denim fabric!)


With right sides together, I sewed the front and back of each placemat together along the top and bottom edges. Then I pulled the placemat through the sewn tunnel to make it right-side-out.
I pressed the unfinished placemats so the seams were in the middle of the top and bottom edges.


With a walking foot on my sewing machine, I stitched-in-the-ditch along all the seams in the kasuri cotton This secured the front and the back of the placemat together.


Pinning first to ensure the outer areas were flat, I stitched 1/8" along both sides.

I made eight 3" x 14" finishing strips of contrast cotton for binding the ends of my four placemats. I chose an indigo and white geometric yukata cotton.
With right sides together, I pinned each finishing strip 1/2" in from the side edges — with the ends of the strips evenly hanging past the top and bottom of the unfinished placemat.

Using a 1/4" presser foot, I stitched 1/4" in from the outer edge of the finishing strip.


Using my walking foot, I stitched-in-the-ditch along the finishing strip from the front — catching the edge of the finishing strip on the backside.

I secured the ends of the finishing strips with stitched triangles that began and ended with micro stitches.

Tada! I finished my set of kasuri placemats!
 ABOUT US: Okan Arts, a petite family business, is co-owned by mother-daughter duo Patricia Belyea and Victoria Stone. Patricia and Victoria sell Japanese textiles online, host creative quilting experiences, and lead quilting & textile tours to Japan.
FOLLOW OKAN ARTS ON INSTAGRAM @okanarts