By Patricia Belyea
WAUCONDA WA Koinobori decorate the landscape of Japan from April to early May, culminating in the celebration of Children’s Day on May 5. Typically hung off a pole, a set of carp streamers represents a whole family. On top is a big black fish for the father; then a rmedium-sized red or pink fish for the mother; and smaller fish below for the children.
I love the way koinobori playfully dance in the wind like koi swimming in a stream. This summer I decided to make koinobori with traditional Japanese yukata cottons and contrasting solid cottons as a birthday gift for my twin, Pamela.
My first attempt failed. The prototype didn't look like a fish and it had many production flaws. On top of that, the wind sock couldn’t fill with air as the mouth was smaller than the width of the body.
Learning from my mistakes, I refined my design and made five successful koinobori. To follow are step-by-step instructions in case you want to make one or a whole school of koinobori!

MATERIAL LIST FOR ONE KOINOBORI
2 yards of Japanese yukata cotton (see Shopping Resource at bottom)
50wt cotton thread for sewing the fish, plus matching thread for the eye oval background and eye swirl detail
Scraps of contrasting solids for the eye oval backgrounds, eye swirl details, and fins
12" x 16" piece of solid cotton for the flanges
10" x 20" piece of solid cotton for the tail facing
24" of spring wire, wire cutters
1 barrel swivel, monofilament
PATTERN MAKING
Trim a yard of 18" wide freezer to 14" wide.
Draw a pattern similar to the one shown below: 10.5" wide and 32" long.
With paper scissors, cut out the pattern on the outside lines.
Note: the mouth needs to be as wide as the main body. (The longish head will be shortened with a 1" hem.)

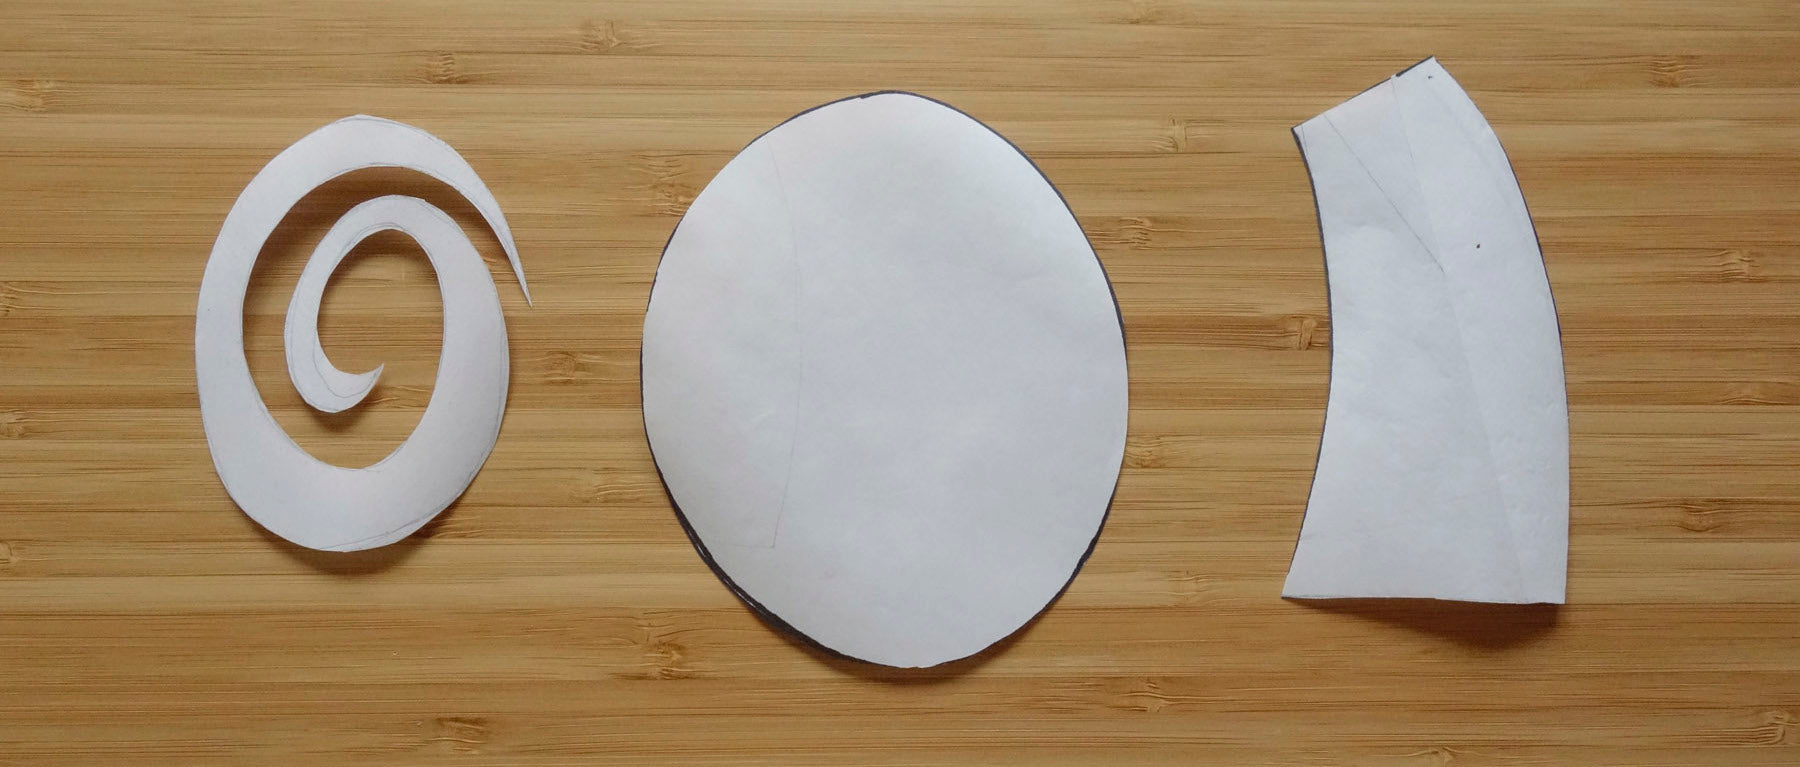
With tracings from your big pattern, cut three separate pattern pieces out of freezer paper with paper scissors—eye background oval (5" high), eye swirl detail (smaller than oval), and fin (5" from corner to corner).
CUTTING OUT ALL YOUR FABRIC PIECES
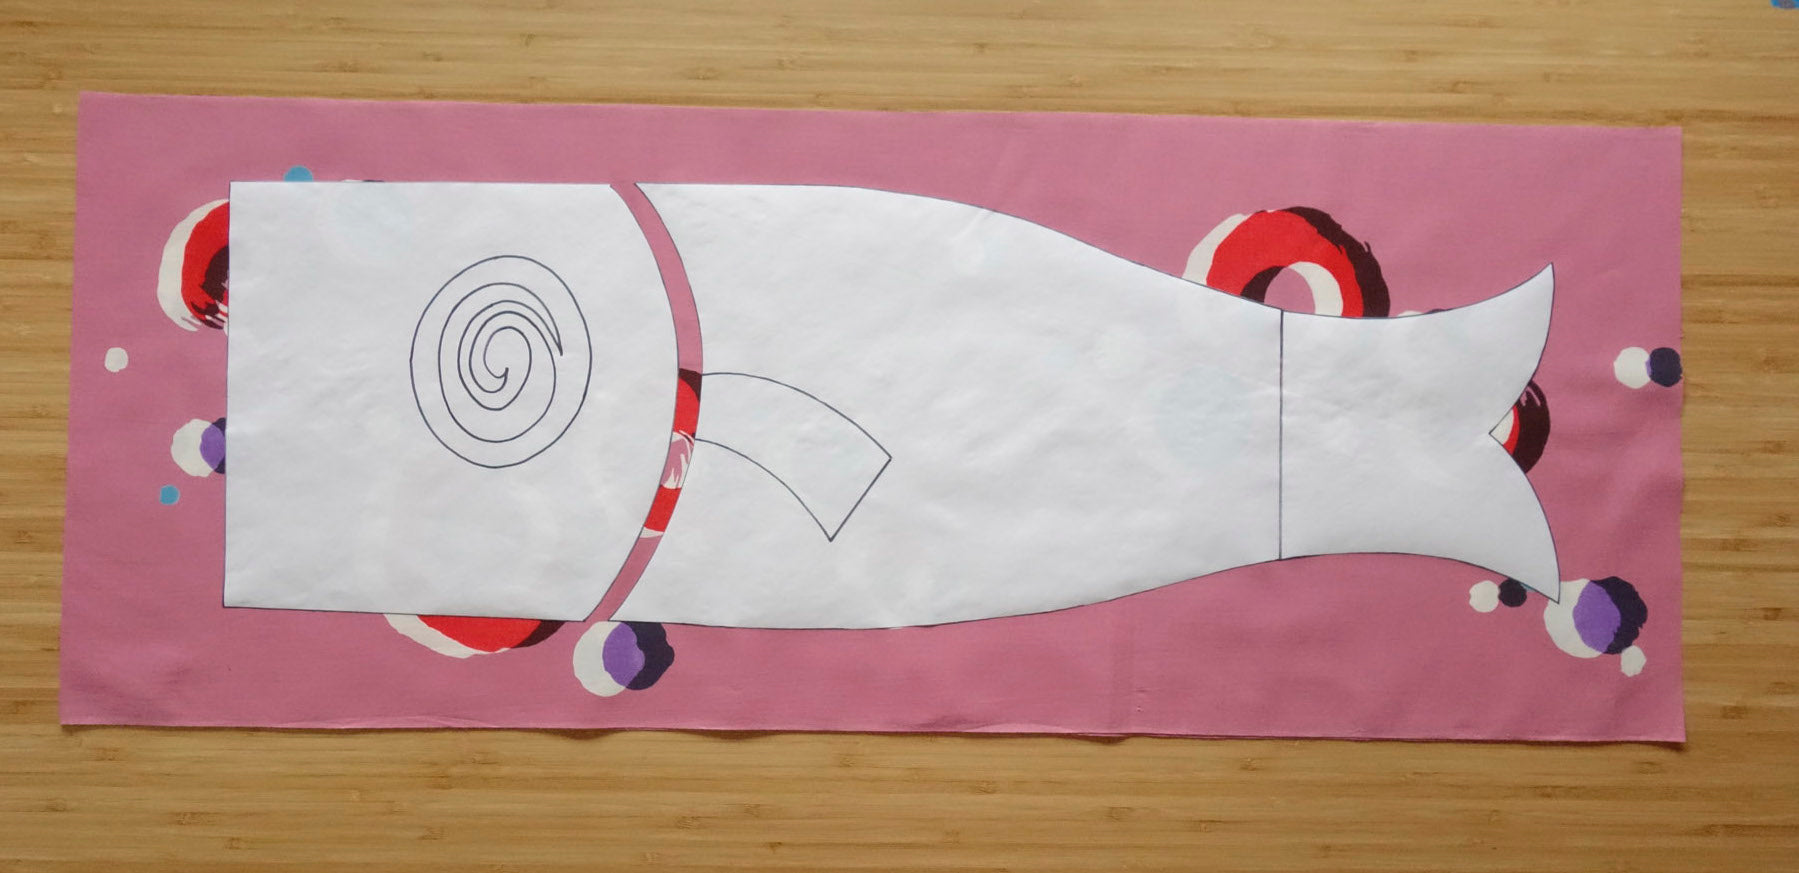
Cut your main paper pattern apart on the curved line behind the head.
With the two yards of yukata cotton on top of one another, press the pattern onto the top piece—leaving a 1/2" gap between the head and the main body pattern pieces.
Handling the pattern/double fabric sandwich gently, cut tight to the paper pattern with fabric scissors—all around the fish shape. Then cut down the middle of the 1/2" gap.
Press the patterns for the eye oval background and the eye swirl detail to the top of two stacked pieces of solid cotton. With fabric scissors, cut the pattern/double fabric sandwiches tight to the paper patterns.
Press the pattern for the fin to the top of four stacked pieces of solid cotton. With fabric scissors, cut the pattern/quadruple fabric sandwich with a 1/4" allowance around the paper pattern. You can eyeball this measurement.
With a rotary cutter, cut out two flange strips, 1 1/4" wide x 16" long, on the bias. Press in half, lengthwise.
With paper scissors, cut off the tail facing pattern piece from the main pattern. Press the pattern for the tail facing to the top of two stacked pieces of solid cotton. With fabric scissors, cut the pattern/double fabric sandwich tight to the paper pattern.

MAKING AND ADDING THE EYES
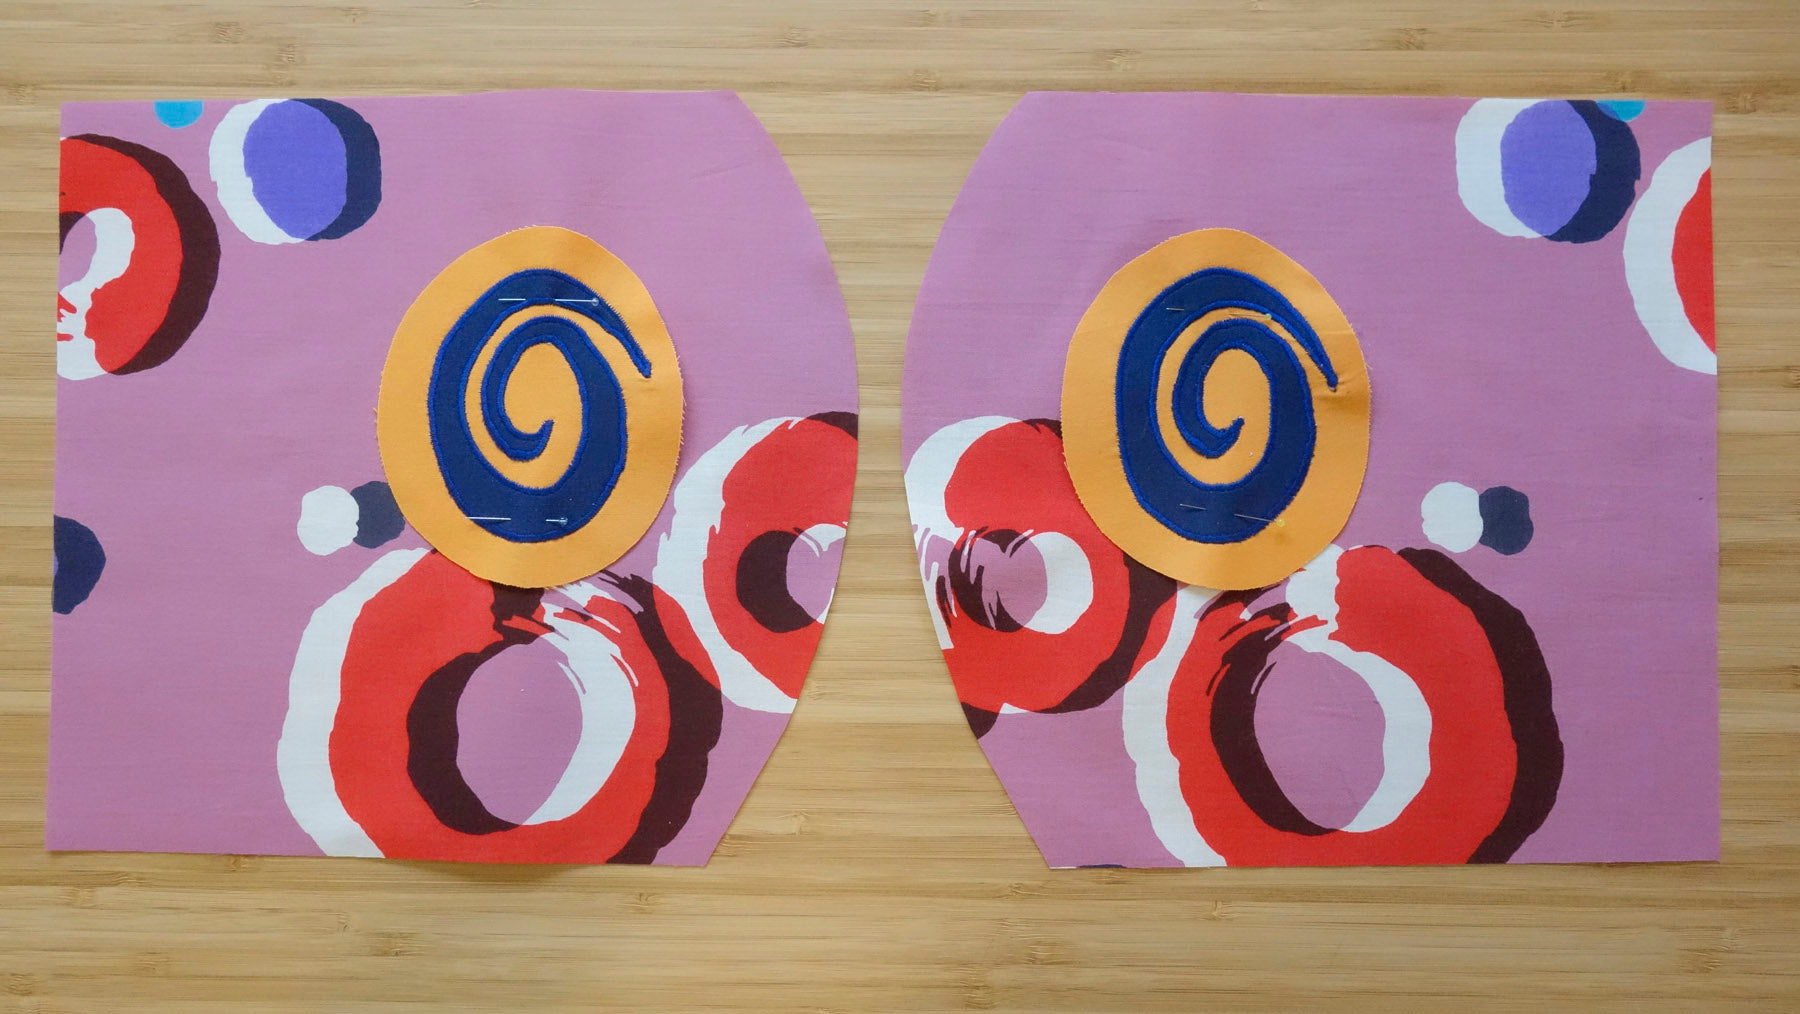
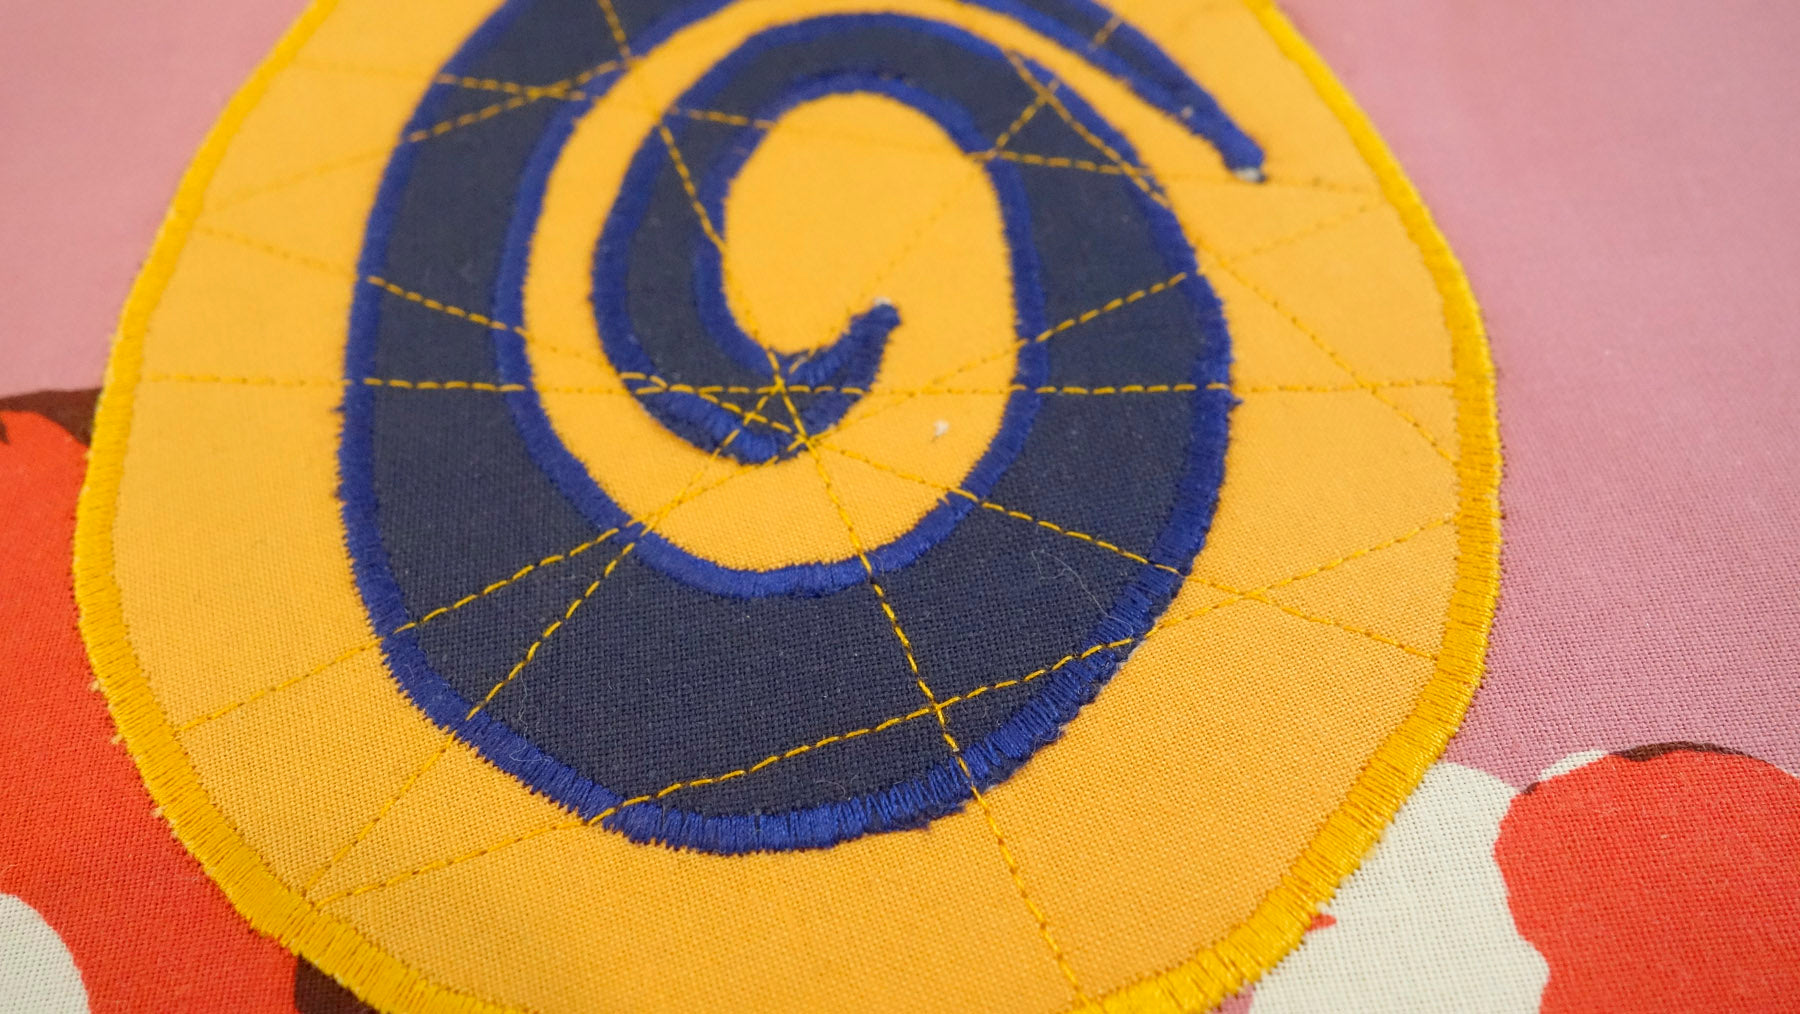
Pin the eye swirl details to the eye oval backgrounds. With matching thread, sew close to the edges of the swirls to secure, then satin stitch around the swirls.
Pinned in position, with matching thread, sew close to the edges of the eye oval backgrounds. Then, have fun sewing back and forth across the ovals to secure. Finish with a satin stitch around the ovals.
MAKING AND ADDING THE FINS
Sew the two fins together with 1/4" seam allowances. Trim the corners and turn right-side out. A chop stick is handy for pushing out the corners. Press flat.
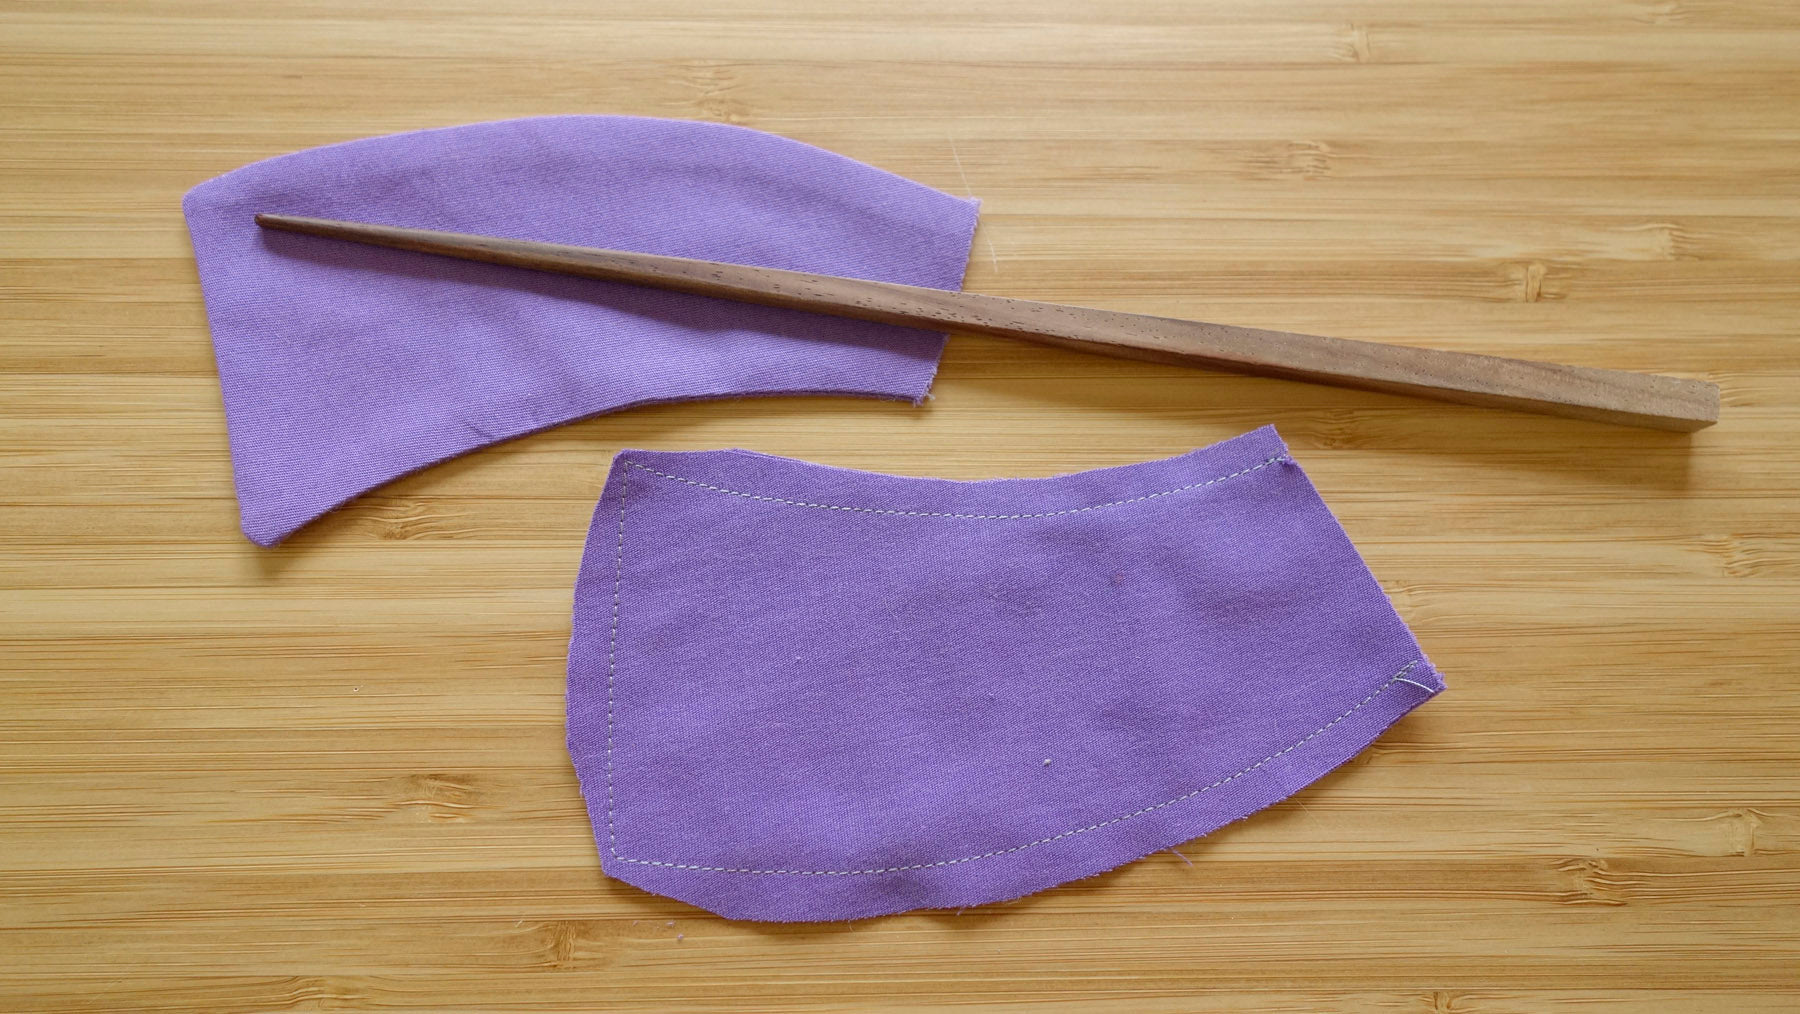
Sew the fins into position on the front side of both body pieces with 1/8" seam allowances.
Add the flanges by sewing onto the front edges of both body pieces with 1/8" seam allowances. Trim the ends of the flanges.

With right sides together, sew the head pieces to the body pieces with 1/4" seam allowances.

Press the seams so the flanges lie flat to the fish body on both sides.

FACING THE TAIL
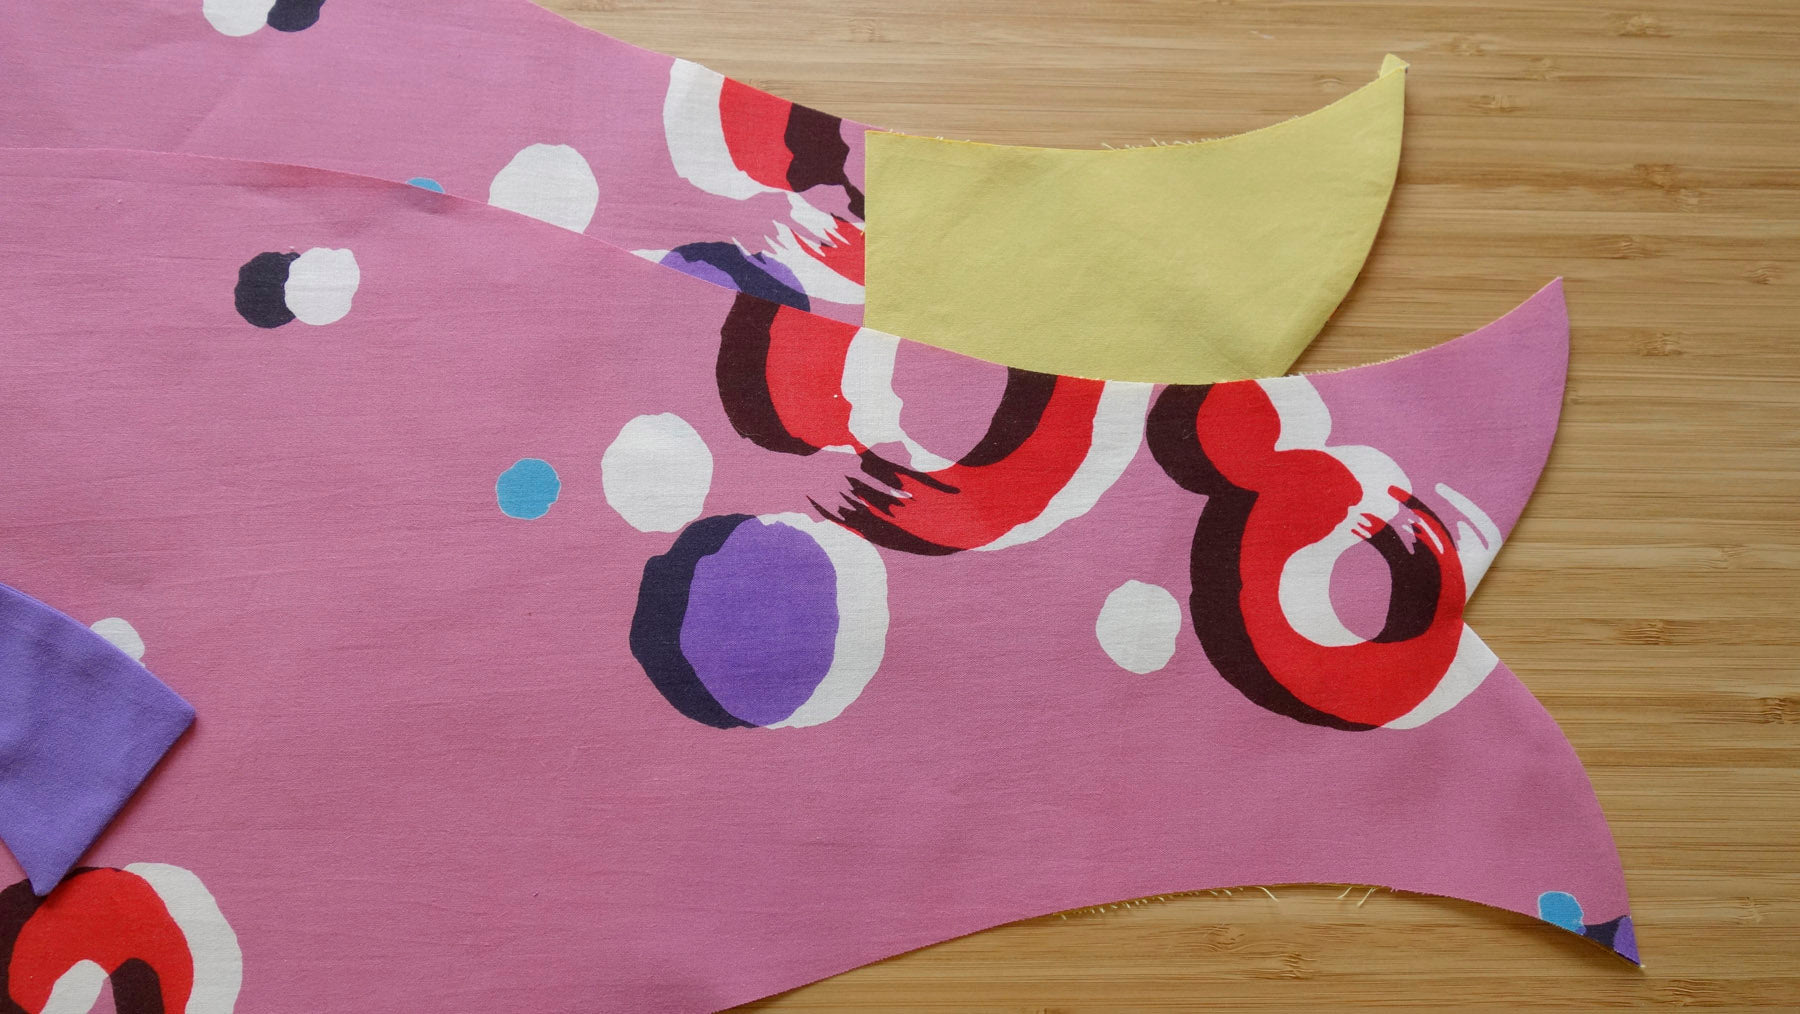
Sew both tail facings to front sides of the body pieces with 1/4" seams. Cut a nip to the stitching at the central V of both tail pieces. Turn the facings to the inside and press to create flat edges.

SEWING THE BODY TOGETHER
Open up the tail facings. With right sides together, pin the top edge of the fish together, including the tail facing. Stitch with a 1/4" seam allowance along the top, making a pivot at the seam where the body joins the tail facing.
Press the top seam open, to the best of your ability. A sleeve ironing board is helpful.
With right sides together, pin the bottom edge of the fish together, including the tail facing. Stitch with a 1/4" seam allowance along the bottom, making a pivot at the seam where the body joins the tail facing.
Press the bottom seams open to the best of your ability. Where needed, finger press.


SECURING THE TAIL FACING
After pulling the tail facing to the inside, double roll the straight edge (each roll is 1/2" wide) to the inside and press. Lay the facing flat to the fish body and stitch around the facing twice. You’ll need to remove your sewing machine bed and sew with just the arm of your machine.
If the facing is not fitting well, open up one seam a little and continue. This will be our little secret.


MAKING THE MOUTH HEM
Find the center point of the head by folding in half and making a small crease at the mouth edge.
Make a 1" cut along the crease through both front and back of the fish head. Fold the edges of both cuts to the inside, at an angle.
Double roll the straight edge to the inside (each roll is 1/2" wide) and press. Secure the mouth hem with two lines of stitching.



INSERTING THE SPRING WIRE AND ADDING THE SWIVEL
Following the dispensing instructions for the spring wire, cut a 24" piece of wire with wire cutters.
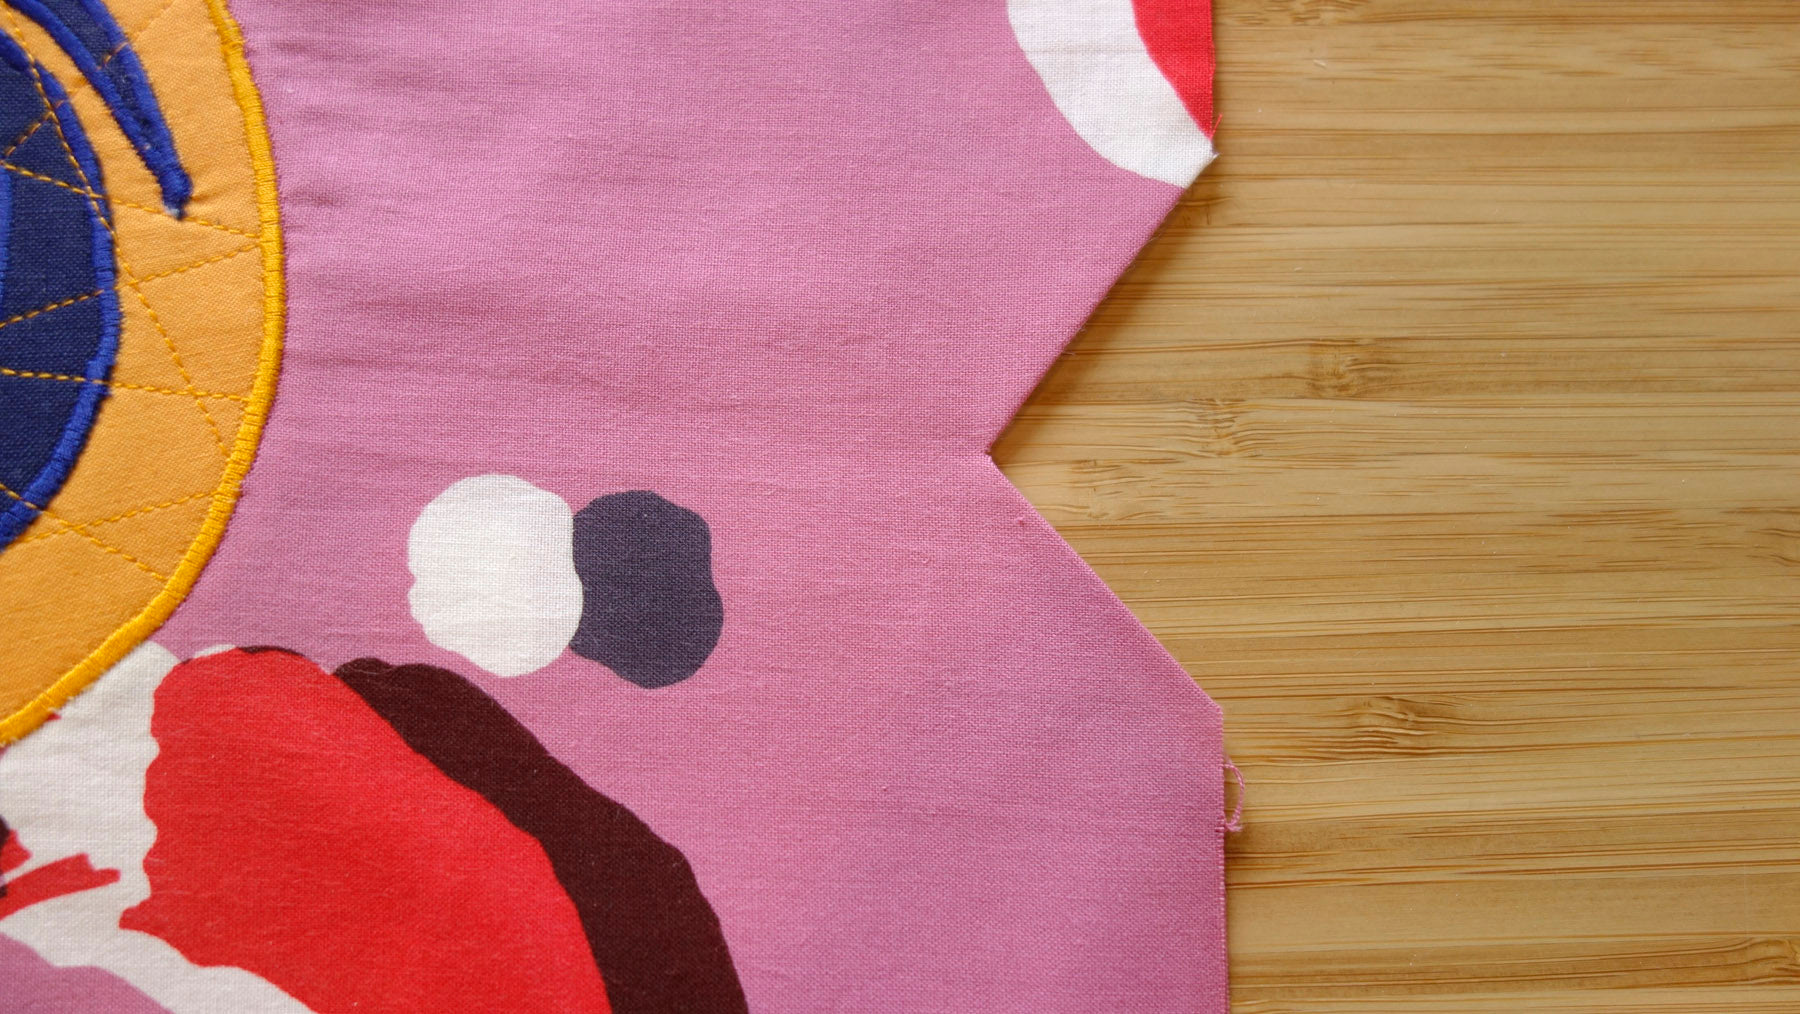
Thread the spring wire through one of the V holes and push it around the mouth hem. Tuck the extra wire ends into either side of the V hole, once the wire completes a full circle. No securing of the wire is necessary.
Spring wire is like a little miracle. It always springs into a circle shape. Although you could use a hanger or other wire for this project, once your circle of wire gets crushed, it’s impossible to make a circle shape again.
Tie a barrel swivel to the center of a 24" piece of lightweight monofilament. Tie both ends of the monofilament to the spring wire where it’s exposed at the V holes in the mouth hem. Trim the end knots.
Head outside and hang your koinobori in a windy place.


SUPPLY TIPS
Freezer paper can typically be found in your grocery store by the waxed paper and plastic wrap. Make your pattern design on the matte side of your freezer paper. Press the shiny side of the freezer paper to your fabric with a DRY iron.
Spring wire can be found at a music store.
Barrel swivels and monofilament can be found in a family member’s fishing tackle box or at a sports store.
Everything mentioned above can be purchased online.
PRODUCTION TIPS
Yukata cotton is hand-dyed, so both sides look the same. Mark, with a set of crossed pins, the outsides of the fish (head and body for both sides) so you don't make one side backwards!
When trimming tight to the pattern pieces, don't cut into the paper pattern. Try to cut exactly beside the pattern piece.
If you’re having trouble cutting through the pattern/fabric sandwiches, it means that your fabric scissors are dull. A great investment is a pair of Japanese KAI pro shears. They cut through fabric like butter.
Relax when you make this project. If nothing is perfect, your carp banner will still bring happiness as it dances in the wind!

Shopping Resource
To purchase Japanese yukata cotton from Okan Arts +click here
If you have any improvements or suggestions for the pattern or instructions, please email me.
If you make a koinobori, I’d love to see a pic! Email me at patricia@okanarts.com


