By Patricia Belyea
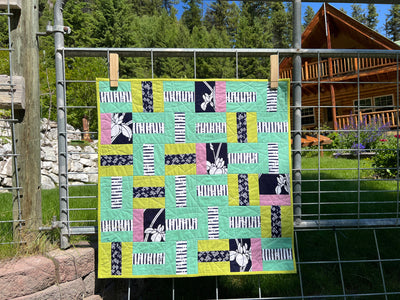
OKANOGAN HIGHLANDS WA The product listing for Good Fortune included the quilt, a custom linen bag, and a Certificate of Authenticity.

When the quilt sold at the recent online Studio Sale, I needed to quick-quick make a custom linen bag. My approach was to make do with what I had at my remote location.
To follow are the steps I took to make a lined boxy bag with a buttoned front flap.

MEASURE THE QUILT
I folded the quilt into a manageable size and measured its dimensions. As I wanted to make a tailored boxy bag, I added ½” all around.

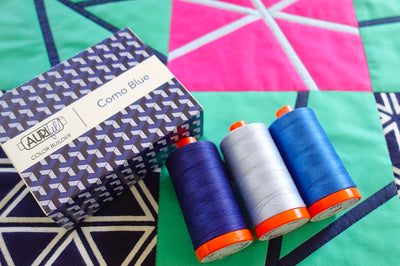
CHOOSE FABRICS
Amazingly I had one yard of yellow Essex Linen on hand, plus white Michael Miller Cotton Couture, and a piece of striped yukata cotton.

MARK THE PATTERN
With the desired measurements, I marked the pattern lines on the back of the linen with a pencil.


APPLY INTERFACING
To add support to the linen, I pressed interfacing to the back of the fabric. Regretfully my available Shape-Flex interfacing was not stiff and I only had narrow amounts. (I recommend medium-weight and much wider yardage.)


I could see through the interfacing to cut along the pencilled pattern lines.
The gaps in the interfacing showed on the front. So I got busy matchstick stitching across the linen. To keep my lines parallel, I marked blue lines with a Clover water-soluble pen every eight lines.


ADD MY SIGNATURE
I hand-stitched a red P to the flap area of the linen.

BEGIN BAG CONSTRUCTION
With right sides together, I matched up the 11" sides and stitched with 1/4" seam allowance.
I had to get creative to press the seams open, using a wooden rolling pin.

 SEW THE FLAT BOTTOM OF BAG
I positioned the seam in the middle of the bottom gap so that everything lined up and stitched a 1/4" seam.

BEEF-UP BAG STRUCTURE
My bag was flimsy due to the wrong kind of interfacing. I had a small amount of double-sided Wonder Under (medium-weight) interfacing that I pressed to some extra linen. I cut the the interfaced linen into 2 1/4" strips and fused the strips to the sides and bottom of my bag. That really helped!


Using a 5/8" strip of linen, I pressed the strip in half lengthwise, and then pressed the edges to the middle. To secure the skinny loop, I machine stitched down the middle. Final pressing was done with a clapper.
 BEGIN LINING CONSTRUCTION
I sewed the striped yukata cotton to the white solid and marked the bag pattern, in pencil, on the wrong side. Then I cut out the lining with both a rotary cutter and fabric scissors.
 SEW SIDES OF LINING
With right sides together, I matched up the 11" sides and stitched with 1/4" seam allowance — leaving a gap in the stitching on one side. (Of course, I forgot about the gap and had to rip out some stitching.)

I positioned the seam in the middle of the bottom gap so that everything lined up and stitched a 1/4" seam.
 CREATE ROUND CORNERS OF FLAP
Using a circular lacquerware lid, I marked both corners of the flap with a quarter-circle pencil line — on both the linen and lining. Then I cut on the pencil lines.
 SEWING TOGETHER THE LINEN AND LINING
I clipped an angled cut at the beginning of the bag flap — in both the linen and lining parts.


I clipped the rounded corners and then pulled the bag through the opening in the lining.
 FINISH THE BAG EDGE
Using my fingers, I pinched the sewn edges of the bag, centering the seam in the middle. Due to the bulk of the interfacing, the edge was slightly rounded so I hand-basted all around and top stitched.


To make your own boxy quilt bag, here are a few tips:

I asked the owner of Good Fortune what compelled her to choose Good Fortune. She answered: Becoming caretaker of Good Fortune is an exuberant step along a continuum of an ever-evolving appreciation / admiration of the Japanese aesthetic. Good Fortune chose me because I love sunflowers and the unexpected visitor.


To make a quilt filled with creativity and gorgeous Japanese textiles, and then to share the quilt with someone who appreciates it wholeheartedly—what a wonderful experience for both of us!
# # # # #
ABOUT US: Okan Arts, a petite family business, is co-owned by mother-daughter duo Patricia Belyea and Victoria Stone. Patricia and Victoria sell Japanese textiles online, host creative quilting experiences, and lead quilting & textile tours to Japan.
FOLLOW OKAN ARTS ON INSTAGRAM @okanarts