By Patricia Belyea
WAUCONDA WA Dragons in Japan are noble creatures that bring good fortune. Most Zen Buddhist temples, believing in their benevolence, have dragons painted on the door panels or ceilings of their assembly halls.

Japanese dragons, long and snakelike, have the head of a camel, the eyes of a rabbit, the ears of an ox, the horns of a deer, the paws of a tiger, the claws of an eagle, and the scales of a carp.
DRAGON PANELS!
Our Dragon Panels are an exciting find from Niigata, 200 miles north of Tokyo. The vintage yukata cotton is hand-dyed with a dynamic indigo dragon and wind swirl patterns on white.
Although Okan Arts has sourced great amounts of Japanese textiles, only once before have we seen a yukata cotton with a dragon pattern. And, we were able to procure 122 Dragon Panels—which is amazing! (SORRY—now Sold Out.)

JAPANESE DRAGON QUILT
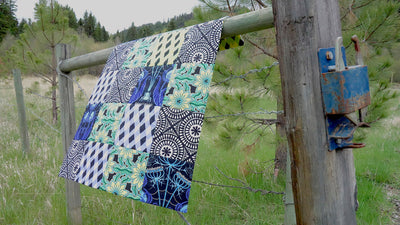
To follow is the step-by-step process I used to make a comfort quilt (38 1/2" x 55") with one Dragon Panel.
MATERIALS FOR QUILT TOP
Dragon Panel — one panel, approximately 14" x 36"
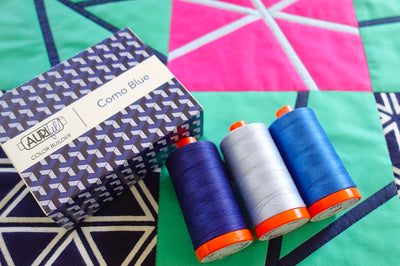
Geometric Yukata Cotton — 3 yards
Solid Colored Cotton — 3/4 yard
FUSSY CUT THE DRAGON
Make an 11" x 22" trimming template out of freezer paper to cut out the dragon figure. Position the template over the dragon and press on with a dry iron. Using a 24" gridded ruler, trim 1/4" all around the template for an unfinished block size of 11 1/2" x 22 1/2".
Dragon from Dragon Panel — 1 large, long block


FUSSY CUT THE WIND SWIRLS
Make a 5 1/2" square trimming template to cut out the wind swirls. Press the template to the remaining panel fabric, capturing a wind swirl. Using a gridded ruler, trim 1/4" all around for an unfinished block size of 6" x 6".
Wind Swirls from Dragon Panel — 3 blocks

CUT THE GEOMETRIC AND SOLID BLOCKS
Cut the auxiliary fabrics into squares with an unfinished block size of 6" x 6".
Geometric Yukata Cotton — 28 blocks
Solid Colored Cotton — 31 blocks

DESIGN THE QUILT TOP
Place all the blocks on your design wall, determining the position of your Dragon and Wind Swirls—7 blocks across, 10 blocks down.

SEW THE QUILT TOP
Sew the blocks together into rows and press the seams open. Each row should be very flat.


Sew the rows together. To line up the intersections, push a pin through the seam on one side and make sure the pin pops out of the seam on the other side.

Finish sewing the top together, pressing the seams open.

QUILT BACK
Make or find a quilt back that is at least 46" x 63". If the backing fabric is white, take care that there are no threads that could get caught in the quilt sandwich.

SECURING THE QUILT SANDWICH
Pin baste the sandwich made of the quilt back, batting, and quilt top. Tailor baste the pinned quilt sandwich from the back, using a contrasting thread. Then remove the basting pins. The quilt sandwich is now secure and smooth.


MAKING A STITCH PATTERN
Draw a giant swirl on an 18" square of freezer paper. Cut out the swirl on the pencil line and also about 1/4" away from the pencil line, leaving bridges throughout so the pattern is not too flimsy.


MARKING THE STITCH PATTERN
Using a dry iron, press the freezer paper stitch pattern to the front of the quilt top. Trace around the swirl using a water-soluble marking pen or other marking tool, going along the side of pattern that was your original pencil line.
Using the stitch pattern again and again, mark the quilt top with more swirls—filling the whole area.


BIG STITCH
Enjoy big stitching along the marking lines with No. 8 perle cotton or another thread choice. Drop double knots into the quilt sandwich at the beginning and end of each length of thread.

FINISH
Block, trim, and bind the quilt. The edges of my Japanese Dragon Quilt are finished with a Designer Facing.